Table of Contents
Installing SQL Server 2008 R2
Download
Click one of the download links below to install the version appropriate for your architecture.
Install
- Launch the package, you will then see the contents extracted to a temporary location.
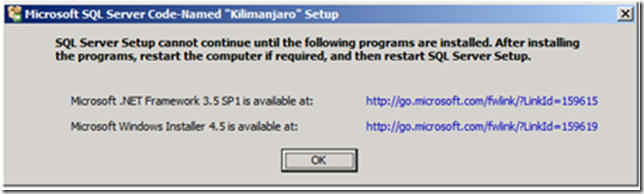
- SQL Server Setup checks to determine pre-reqs are installed. If not, you will be prompted to install. Click the each link to go to the download site, download the installer provided there, and install the required software.
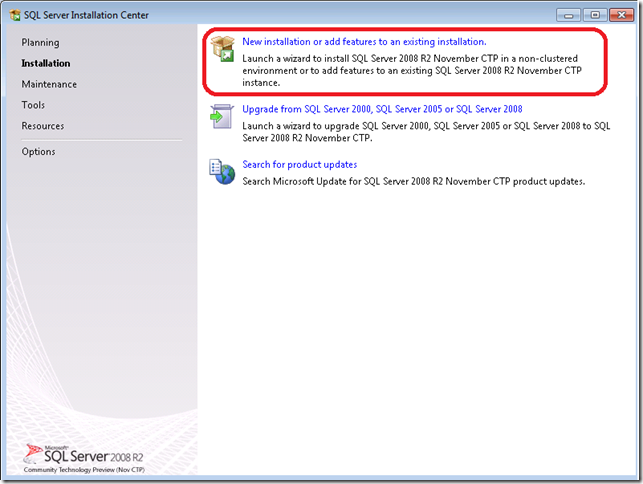
- The Installation Center will then launch. Click on “New installation or add feature to an existing installation” to start the Installation Wizard.
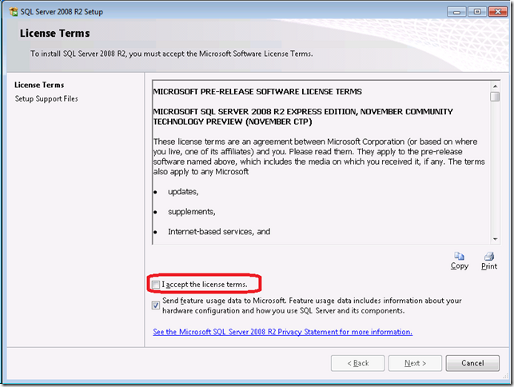
- Accept the license terms. If it then tells you that Windows PowerShell failed or needs to be installed to continue, follow this link and click the large, green Download button. DOWNLOAD The download should begin on the next page automatically. If not, refresh the page. Do not click any of the links on this page that say “Start Download” or “Download Now” as these are ads.
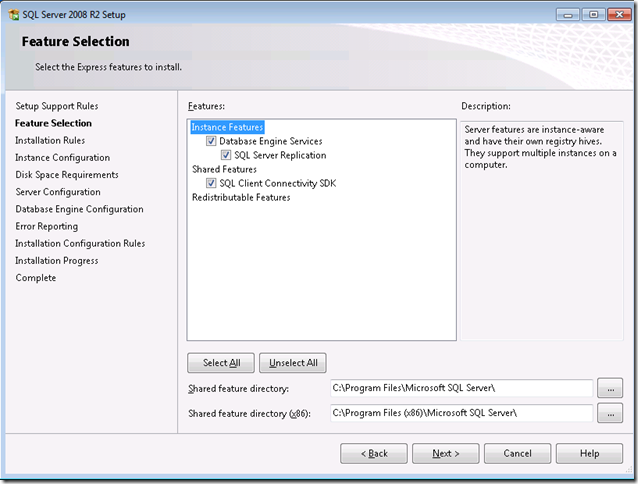
- Review the features to installed and where SQL Server will be installed. Make any changes that are necessary for your environment. This can be left as it is if you are not sure.
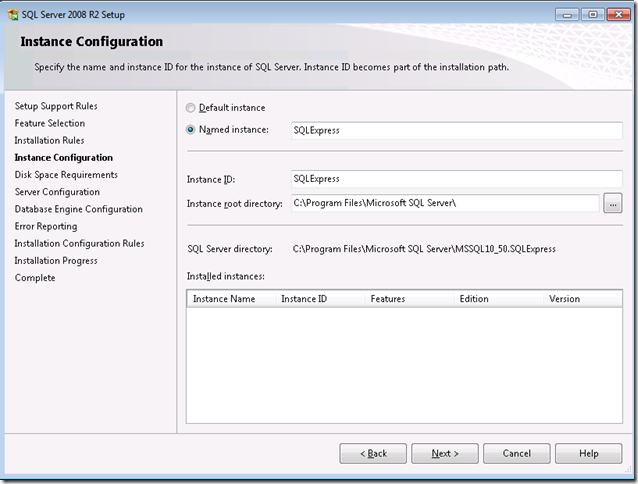
- Review the “Named Instance” and change if necessary. The “Instance ID” will automatically match the “Named Instance.” !!Write this name down!!
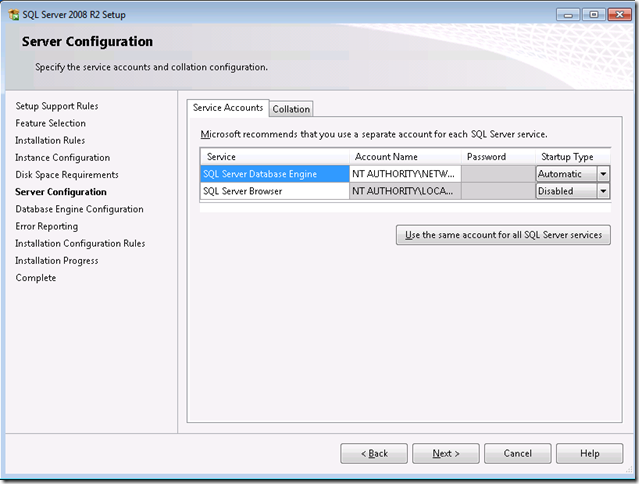
- Review the credentials that will be used for the services that will be created. Click the Use the same account for all SQL Server services. Enter an “Account Name” and “Password” for a user account that will administer the SQL Server. This account must already exist on the system. Click Ok and click Next.
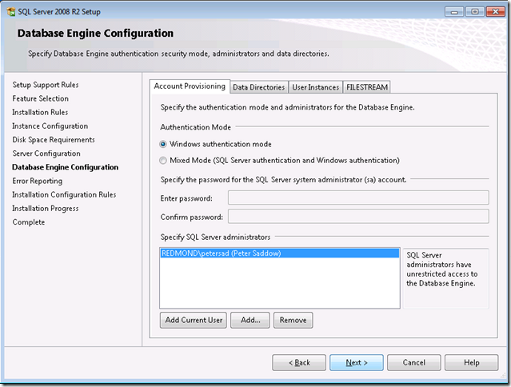
- Choose the Mixed Mode Authentication. Enter a password (twice) for the “sa” account. !!Write this password down if you are installing AppMonitor!! Continue to add any additional users into the box below if desired and click Next.
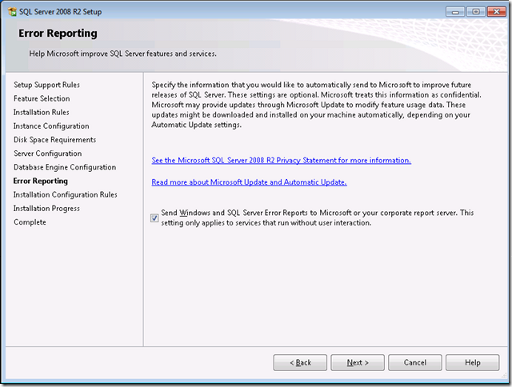
- Review the Error Reporting settings.
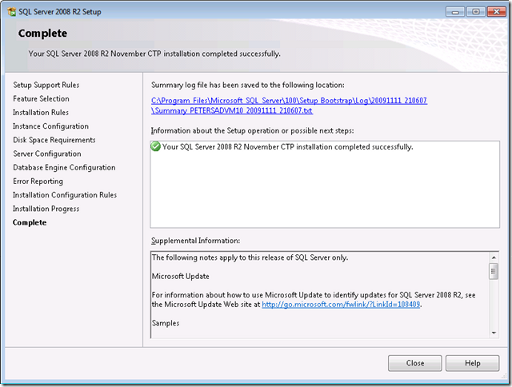
- That’s it!
Configure
- After successfully installing SQL Server Express, go to Start > All Programs > Microsoft SQL Server 2008 R2 > Configuration Tools > SQL Server Configuration Manager.

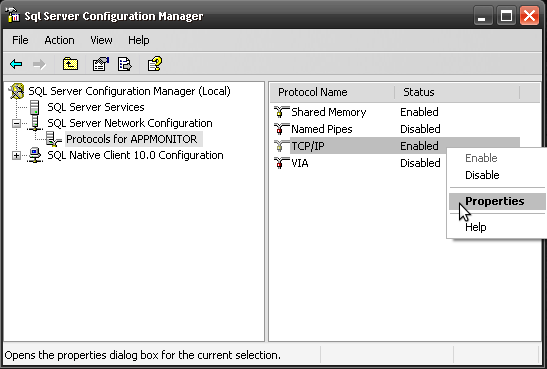
- In the left-hand pane, expand the SQL Server Network Configuration node and click on Protocols for [YourServerName].
- In the right-hand pane, right-click on TCP/IP and click Properties.
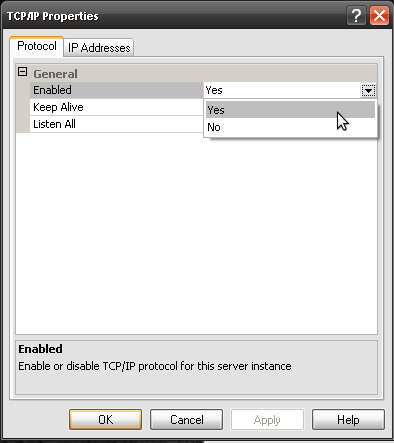
- Under “General” next to “Enable”, change the No to a Yes.
- Above that, click on the IP Addresses tab.
- Here you will see two more “Enable” lines. Change them to Yes.
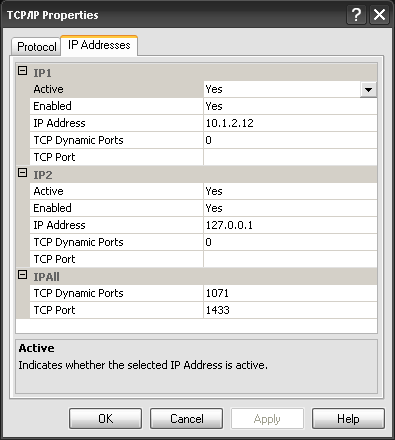
- At the very bottom of the list, under “IPAll” there is a line that says “TCP Port”. Enter 1433 into the field next to it and click Ok. Ignore the warning that follows.
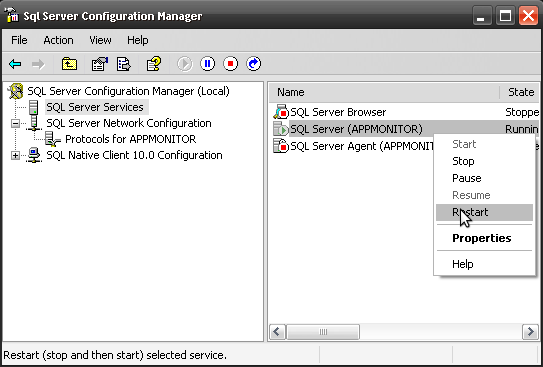
- In the left-hand pane, click on SQL Server Services.
- Right-click on SQL Server (YourServerName) and click Restart.
- After restarting, SQL Server should be ready to use. If you are installing AppMonitor, follow this next guide. CLICK HERE
Change Firewall Settings
The SQL Server uses port 1433, therefore the firewall must be configured to allow this port to communicate.
Windows Vista or 7
- Be sure you have permissions to change firewall settings.
- Click on Start > Control Panel.
- If the “View” is by “Category” click on the System and Security header, and click on Windows Firewall. If the “View” is by “Icon” just click on Windows Firewall icon.
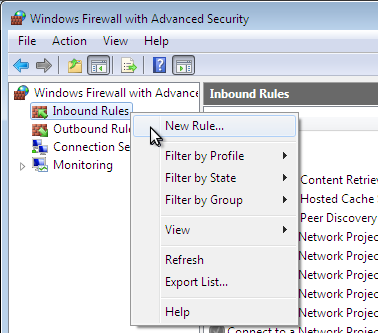
- In the left-hand pane, click on Advanced Settings.
- In the left-hand pane of the new window, right-click on Inbound Rules and click New Rule….
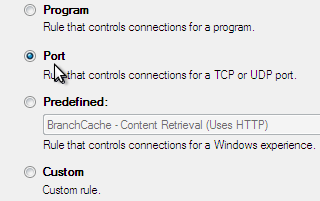
- Select the Port radio button and click Next.
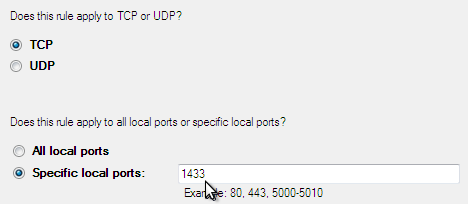
- Next to Specific local ports, type 1433 in the field and click Next. Click Next again.
- Uncheck the Public checkbox, unless you know the SQL Server will need this functionality, and click Next.

- Type a name in the field so you can remember what this firewall rule does and click Finish.
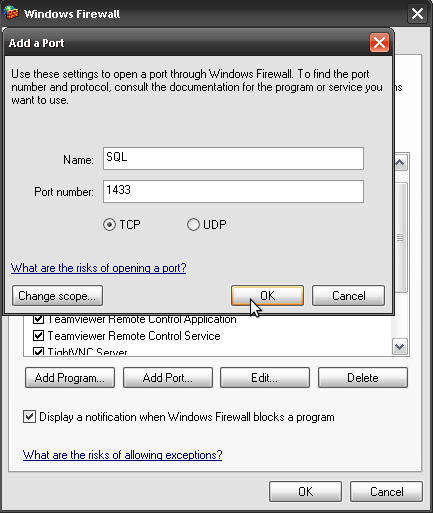
Windows XP
- Be sure you have permissions to change firewall settings.
- Click on Start > Control Panel and double-click on Windows Firewall.
- Click on the Exceptions tab at the top.
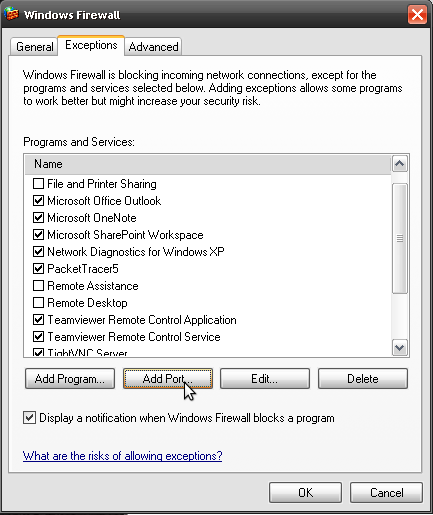
- Click on the Add port… button near the bottom.
- Provide a name in the “Name” field so you can remember what this firewall rule does, type 1433 into the “Port number” field, and click Ok. Click Ok again.