User Tools
Table of Contents
Backing Up Files
File backups will normally run on a set schedule. To perform a backup manually:
- Click the Backups tab on the main dashboard panel.
- Click Host Summary under the “Server” menu on the left.
- Under the hosts table, click the name of the host you wish to manage.

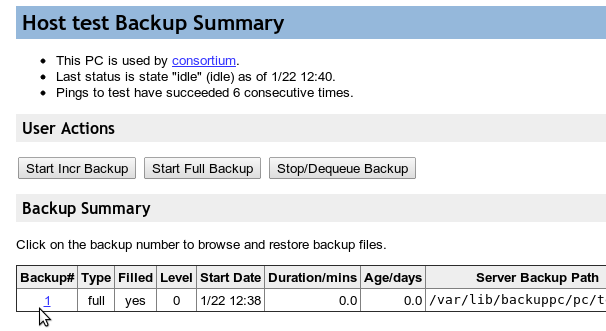
- You are now in the “Host Backup Summary” page.
- Under “User Actions” there are 3 buttons: Start Incr Backup, Start Full Backup, Stop/Dequeue Backup.
Incremental Backup
An incremental backup only backs up new files and files that have changed since the last backup of any kind. This is a faster, more efficient process because it ignores files that are already backed up or haven't changed. You can perform an incremental backup after making a change to a single document and it will be backed up along with the other files.
Full Backup
A full backup performs a backup of all specified files and folders regardless of whether they have changed since the last backup. This option transfers all data, and can be a lengthy process if there are many files or very large files. It is not often necessary to perform a full backup manually.
Stop/Dequeue Backup
This option provides a safe method of halting a backup process or delaying a scheduled backup. After clicking this button, you are prompted to confirm your decision, but you are also given the option to “Please don't start another backup for hours.” Fill in this field to delay a backup.
Browsing/Restoring Files
To browse through and restore you backup files, return to the “Host Backup Summary” page:
- Click the Backups tab on the main dashboard panel.
- Click Host Summary under the “Server” menu on the left.
- Under the hosts table, click the name of the host you wish to manage.
- You are now in the “Host Backup Summary” page.
The “Backup Summary” table shows the history of backups that have been performed from this host. Files can be reverted to a previous version by restoring them from a backup performed at previous date or time.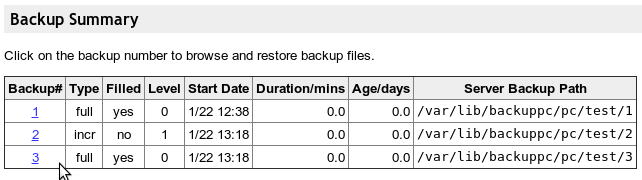
- Click the number of the backup you wish to browse.
- You can now navigate through files and folders by expanding the folders in the directory tree on the left, or by simply clicking the desired folder name in the table on the right.
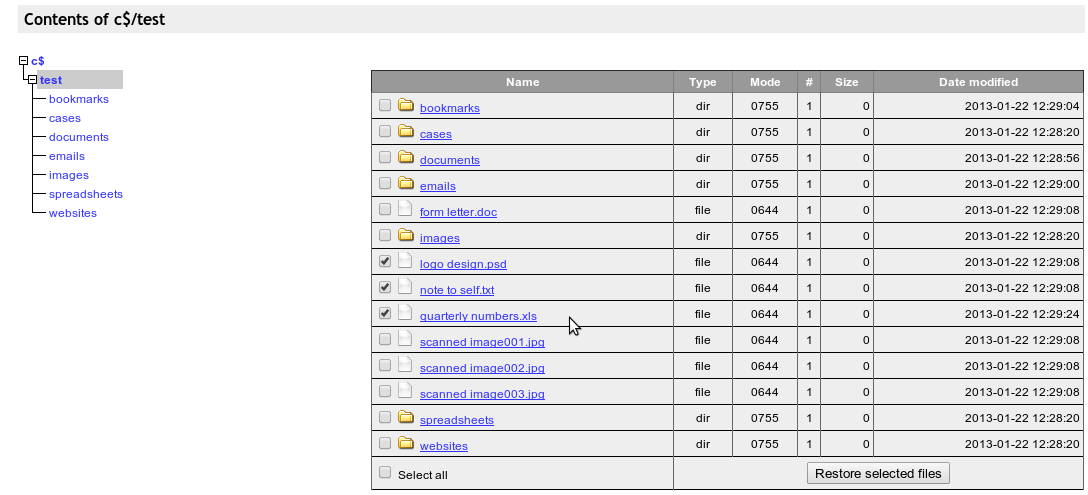
- When you have located a file you wish to retrieve, click the file name and it will be downloaded to your computer.
- Alternatively, to restore a group of files or folders place a check mark in the boxes next to their names and click the Restore selected files button at the bottom of the table. This will present you with 3 options:
Option 1: Direct Restore
This option restores files and folders to their respective locations on you computer. WARNING: This will overwrite the files on your disk with the files from the backup, reverting them to an earlier version. Only choose this option if you wish to replace the files.
Option 2: Download Zip Archive
This option places the specified backup files and folders into a zip file and downloads it to you computer. This is a good option if you wish to keep your current files and the newly restored files separate. The zip format works with all Windows, Linux/Unix, and MacOS systems.
Option 3: Download Tar Archive
This is similar to downloading a zip archive. Tar is simply a different archive format. In some cases, the tar format may be desirable for personal archiving or compatibility with other utilities. Linux/Unix or MacOS systems can work with tar archives by default, but Windows users will likely prefer a zip archive.
